Yes… after 16 (yes sixteen) months living in the RV on the lot, construction has finally begun! As can be seen on this photo, the major part of the lot has been carved for the
mamposteo or stone foundation for the house. The suggestion by Pleinguy, a reader, to get a Bobcat was a splendid one. Thanks. So, here is how it goes.
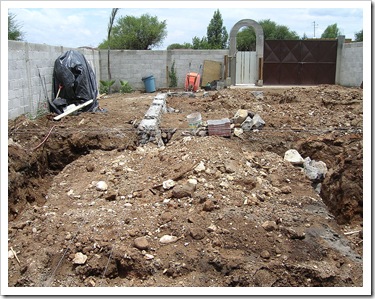
Although we live in a sunny climate, when the rain comes, it does so in style and abundance. This is why the excavation must be down to the rocky level of
tepetate, also called caliche, on which to build the foundation. There is no basement. First the desired level is established with the simple but clever method of filling a tube with water, and holding it up to mark a post. (See A Solid Foundation – Part One) Then, strings are put into place that will help the mason see the height and width of the foundation top.

The trenches went from 1 metre deep to 1,20 m. The
mamposteo is wider at the bottom but will follow the same width and height at the top as indicated by the white string. You might click on the previous photo to see the strings more clearly.
On the photo below, you can see how much wider the base is compared to the top, which must be flat. I’ll explain in a later post what is built on it.
Here are the duties of

each man. The mason is the technician and decides the type of cement, concrete, or mortar he will require for the job. He arranges the stones to form the base and must break them into shape or size, BY HAND, with a hammer.
His helper brings the stones close enough to the mason so that he can remain in the trench. After the helper has mixed the
mescla or mix required by the mason, he brings it to the mason in a bucket. He drops it in a plastic box. Check in the middle of the first photo for the box.
Here are some of the stones used and broken by hand.
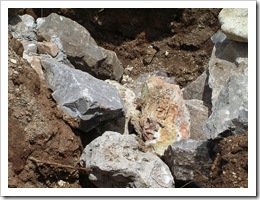
On the second photo, you will notice that spaces are left open at certain intervals. They will be filled with armed concrete columns to support both the roof and keep the cement (or brick) wall stable. But that’ll be described in another post.
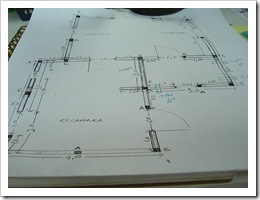
On the next two photos you can see parts of the plan that I have drawn by hand. Dimensions are indicated, also are the strategic places where either a
castillo or
armex will be placed. These placements I have learned from a terrific woman named Yvonne who is building a gigantic house and a large building in which will be housed her cooking school (she’s a Chef) and a greenhouse among other things. Her help has been invaluable and although I have thanked her in person, I feel that she is owed recognition here.

Here’s where it ends. I hope I haven’t bored anyone but also that I have provided the necessary information to those who are interested in what some construction looks like in this part of Mexico. BTW it is probably how it’s done all over Mexico. Their ancestors built PYRAMIDS!
My costs for the excavation, carting of the dirt, materials and manpower are as follows.
Excavation:- 8 hours @ $250 pesos per hour $2,000 pesos
Carting off of dirt: 6 truckloads @ $200 pesos each $1,200 pesos
4 Bags of cement @ $107 pesos each $428 pesos
12 bags of cal (limestone)at $34 pesos each $408 pesos
Manpower 40 hours for both @ $520 pesos a day $2,080 pesos
NB. They were short the full 44 hours a week each. They had to go to a fiesta Friday afternoon. How better to end a week of hard labour. I joke with them that I get double the workload from them: mason and helper, and mariachis-to-be…. they sing and joke all day long. My happiness level shoots up by at least 200% as I listen to them. Between the rasping of the shovel as Jorge mixes the cement, the blows of the hammer as Marcelino breaks the stones to his liking, and their singing and kibitzing, I wouldn’t wish to be any other place!